Halloween Crafts
Do it in 20 minutes or do it over 2-4 weeks.
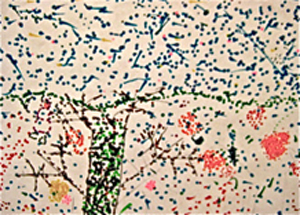
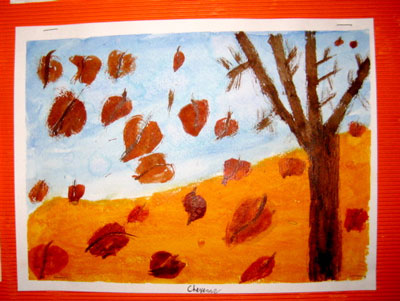
Halloween Crafts - Pumpkin and Autumn Leaves Placemats
From quick and easy craft to an extensive preschool activities, craft and games; you may fill your Halloween Special event with a one time craft session, or extend it to a week or even a month, building up to the Halloween Day celebrations.

OBJECTIVES
Halloween Celebration is a day of opportunity where kids can indulge in some Halloween Crafts :
- To celebrate the occasion
- To enhance creativity
- To improve eye-hand coordination
- To work on fine motor skills
- To experience with colors
- To have fun
AGE
- 3 yrs onwards
- 1 piece of 12-by-14-inch poster board for each kid
- Pencils
- Glue
- Scissors
- Black, orange, and gold water-based paint
- Paintbrush
- Other Recycled materials (see "preparations" below)
- Plastic lamination rolls or sheets
- Laminating Machine

PREPARATIONS
There are a few options for the placemats design:
- Make a few different shapes and sizes as pumpkin templates.
- Use magazine pictures of pumpkins / harvest….. etc
- Use pictures of your kids with pumpkins - from the previous years.
- Take photographs of individual kids holding a pumpkin or in front of some Halloween decorations. (Children may have a choice) Print them and use them for the place mats. An easier way to use photographs for such Halloween crafts is to use any photographs, cut them and stick them on the pumpkin (or using the pumpkin as a photo frame) With advanced technology, it doesn't take more than a day to prepare this.
If you live in a cold country experiencing Fall, have the kids go outside and pick some fallen leaves. (Leaves should not be so dry that they would crack up). Then press the leaves in between pages of some old unused books or magazines. Old Phone Books are ideal.
If you don't get Fall leaves easily, you can make templates of leaves and have the kids to cut and paint them. You can also buy some of these artificial colourful leaves from Dollar Store or any plant store.
Halloween Crafts like this is rather flexible. In fact, the more recycled materials you use, the more opportunity for creativity you're providing.
Here are some ideas of other recycled materials you can use: (anything that doesn't bulge)
- Scraps from your paper punch - preferably colourful ones
- Old magazines - look for orange, black, red, brown…. colours of Fall - tear or cut them into small pieces
- Paper Dollies, Serviettes, Foil …etc (Look around your kitchen)
- Stickers
- Glitter pens
- Fabric
STEP BY STEP INSTRUCTIONS for a 20 minute session.
- Ensure the children washes their hands
- Put on an art apron
- Cover art table or floor with disposable plastic sheets or newspaper to protect the table / floor
- Have sufficient paints – quantity and variety of colors
- Instruct younger kids to use just their finger tips. Older kids can use paintbrushes.
- Paint the pumpkins orange with black noses, mouths, and eyes.
- Decorate all over with autumn leaves or whatever recycled craft materials you have provided.
- Leave the mats on a drying rack, or on the floor in the corner of the room; or carefully pin them up on the display wall.
- When the place mats are dry, laminate them. have the kids write their names on the reverse side.
SCHEDULE FOR A 6-SESSION HALLOWEEN CRAFTS PROJECT
20 minutes or more per session.
- Session 1 -Collect / prepare autumn leaves
Take the kids outdoor for a stroll. Along the way, pick up autumn leaves for the Halloween Craft project that you will be doing. Place each leaf in between pages in old phone books or magazines to dry (for 2 - 4 weeks)
If autumn leaves are not easily available, have a craft session to prepare the leaves cutting out the shapes from construction papers and painting them.
- Session 2 - Prepare recycled materials
Cut out pictures of harvest, fruits, pumpkins, leaves...etc from old magazines.
If pictures are not easily available, just look for Halloween / harvest colours - brown, orange, black, green, of different shades. Cut them up into small pieces to be sprinkled all over the place mats.
Have the older or more active kids to string some of these cut outs for classroom decorations.
- Session 3 - Photo shoots
Kids love their pictures taken. Allow creativity from each kids as they decide where they would stand / what they would hold / how they would like to pose...etc
Spend the whole session taking as many photographs as possible. Kids can also learn to take pictures of each other. With today's digital technology, there's no fear of wastage if pictures did not turn out right. What a great way to train children to handle cameras and practice their eye coordination. Note that all pictures may not turn out right, so ensure you have taken enough so you don't have to do it again.
While taking pictures, engage other kids to decorate the classroom with black and orange streamers.
- Session 4 - Prepare the Pumpkin Cut outs
Trace the shape of the prepared pumpkin template onto the poster board. Kids may choose to use one or more. They may want pumpkins to overlap each other.
Then cut out the shapes - Kids should have learned how to use the scissors
- Session 5 - Design the place mats
See step by step instructions (above) for this.
- Session 6 - Halloween Celebration Fun and Games
Click on this link for Clean and Fun Halloween games and activity ideas
Include Arts for the Fall / Autumn during this season
Go to top of page - Halloween CraftsGo to Forum Page to share your experiences and ideas
Check out other special days activities and crafts


New! Comments
Have your say about what you just read! Leave me a comment in the box below.